Update

So I managed to get a screen on the Ardu-weld (which I have now decided to call Ardu-MIG) doesn't look too bad and can update the info on the display on the fly when adjusting feed speed and gas delay. I am implementing a latch mode and possibly a stitch mode, but will see how that goes.
Welding Practice
Even though I could wax-lyrical about how welders work, I can't weld for jack-shit! This is apparent in the fact that I have tried to weld the steering guard back on big blue 3 times and 3 times I've driven back from a trail with it in the passenger seat! Still better than it catching a lift on an AA truck with track rod in your hand!
I thought I'd look up welding tutorials on YouTube and came across this guy: +ChuckE2009
The tutorials are a little long winded, but its necessary as there are lots of factors to consider when stick welding (drag angle, angle to the work, electrode types). He does seem to know his subject well, young enough to remember, old enough to be experienced, good balance!
Budget!
I am basically learning how to weld with my means here! I am skint, have limited space and am willing to learn, so as you'd expect, my kit is not the best, nor do I have the facilities so I have to make it do!
So after watching the playlist, I thought I'd have a go, and managed to scrounge some scrap from a neighbor. bit of a buff up with angle grinder to remove rust and it was good enough.
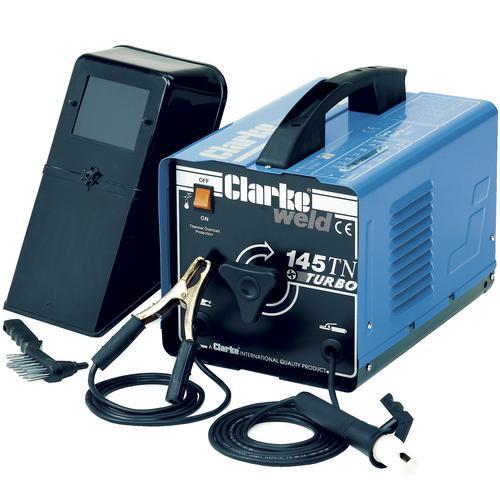
I already had a stick welder, which I manage to get for about £40 just a basic thing! It has seen better days, the electrode holder was on its last legs but the cabling was in good nick and the cooling fan did still work, so it was mostly cosmetic.

I bagged some electrodes at the local farmers auction! Probably 10kg of a mix bag for about £20! Bargain! Their quality couldn't be call on, as for all I know they could have been stored in a damp area, but they looked good, no signs of dampness!
I bagged some electrodes at the local farmers auction! Probably 10kg of a mix bag for about £20! Bargain! Their quality couldn't be call on, as for all I know they could have been stored in a damp area, but they looked good, no signs of dampness!
 |
| Left to right: 2.5mm (unknown type), ESAB 30.25(?) 3.25mm, 6013 3.25mm, Stainless Steel 3.25mm |
So for practicing I used the 6013 3.25mm as it suited the metal thickness I was using and was the only one I could identify from the welding tutorials!
So out in the Garden (after the kids gone to bed) I set-up my work space:

- No welding within 3m of flammable materials - shed is full of bottles of various petro-chemical fluids from servicing vehicles, oh yeh and AND ITS A WOODEN SHED!
- Not enough room
- Ventilation - you need a lot of ventilation when stick welding, the fumes given off are not nice!
I am aware that I am welding on a wooden board, but the the work is performed upon a large piece of scrap metal which make a good heat sink and only mildly scorched the board. As an extra safety addition I had a fire extinguisher on standby!
I didn't have a chipping/slag hammer, but the back end of a claw hammer did the trick. I do have a welders mask which I bought new for about £15, just a flip down thing with a flipable lense. I also had:
- a wire brush, to clear away loose slag
- an angle grinder to cut and clean metal
- some ear defenders - for when I'm using the angle grinder
- some tough garden gloves I use when using the chainsaw
- a piece of box section - I used this to rest on
Sparks Fly!
I set the amperage as per the ratings on the side of the box of sticks and the silk screen on the welder:

I measured the bare end of the electrode by eye with a steel ruler and came out to be about 3mm - so I took the size up for 3.25mm and wound the dial on the front till the pointer on the scale came to 3.25mm or about 115A
First off I decided to put a pad of beads down:

This was to get a feel of things, practice putting and arc down and generally observe if I was moving too slow or fast and if my arc was too long or short. As the pad got warmer I back the current off a bit by about a few amps, I couldn't tell really as there wasn't any scale to go by!
I decided that I was going too fast for the first 3 beads so by the 6th bead I was happy that I'd got my drag speed dialed in. Drag angle appeared to be ok and arc length was bang on.
After a bit of practice I then moved onto a fillet weld and then a triple pass fillet weld. I first tacked up 2 pieces of metal so one was perpendicular to the other:

Then began to weld my single pass fillet weld on one side:

For a first try its not too bad! I seemed to be moving too fast at the start, not enough cut in the middle and improved a bit toward the end.
I then did a multi-pass on the opposite side:

Hmmmm - keep practicing I guess! The light at this point was fading and I was getting thristy - dehydration is not a good thing when trying to learn new things!
Lessons Taken
Well I am better than before and I have learnt quite a bit more than I did, however there are still more techniques to learn (lap weld, open root, vertical up and overhead)
Also my kit did not fair well! The electrode got REALLY hot by the last weld! after taking it apart I found the contact between the cable and holder was tarnished and the grip had melted!! I took it off and ordered a new one for a a Murex stick welder - rated at 400A and much better contact material with brass cable clamping!
My gloves where not thick enough and found out they had holes! not good! ok if your operating a chainsaw, but not for welding! So I order a set of good welders gloves. The mask faired well too!
 |
| Old glove to new gloves; new electrode to old and mask |
More practicing will follow soon and maybe another update on the Ardu-MIG!
If you have any comments or pointers on my welding, feel free do so, I'd be much appreciated! And may thanks to +ChuckE2009, keep up with the videos dude! Helping a lot!